Or course, there is one additional element. Each pixel has three values: one for red, one for green, and one for blue. That means for each pixel we have to calculate three averages and write out each three.
In astronomy, people take pictures of the any of the objects they can see - stars, planets, galaxies, Martians, etc. Unfortunately, due to the distance of these objects, the pictures will often be grainy and noisy. In order to compensate for this noise problem, photographers will sometimes take multiple pictures of the same object in quick succession and then process all the images for the object to create a final, noise-free image. This process is called image stacking.
The light from distance stars, nebula, and other objects in the sky is very dim when it finally arrives here on Earth The Earth's atmosphere can affect image quality, and camera hardware has its own quirks. All of these add up to create noisy images. Image Stacking is a simple algorithm to overcome these issues and create good output from not-so-good input.
The trick to making image stacking work is to capture multiple photos of one object. Because of all the issues mentioned above, all of these photos will be noisy. It turns out that the noise can be removed by averaging all the noisy images into one final high-quality image.
How it works: An image is basically a big two-dimensional array. We can think of each pixel in an image having an (x, y) coordinate. Suppose we have N noisy images, all with the same height and width. Then each image i, where 1 <= i <= N, has the same set of pixel coordinates. Since all our input images have the same coordinates, we can go through them pixel-by-pixel and we can access the same pixel in each image.
What we are tying to do is to calculate the color values for all the pixels in our good image G.
The idea is that we go through the noisy images, one pixel at a time.
In each image we read the value for the pixel at the same coordinate in all the images, and add them up.
Once all the values for that coordinate are read, we calculate the average value. The result is the value for the pixel in the good image.
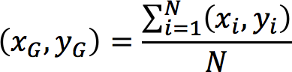
Mathematically, we can say:
Or course, there is one additional element. Each pixel has three values: one for red, one for green, and one for blue. That means for each pixel
we have to calculate three averages and write out each three.
A photographer has given you image data for 3 astronomical objects that he would like you to process. For each object, he took
10 photographs and placed them in a directory. All of the photographs are very noisy. For example,
here is one of the photographs of the Interstellar Bubble N44F:
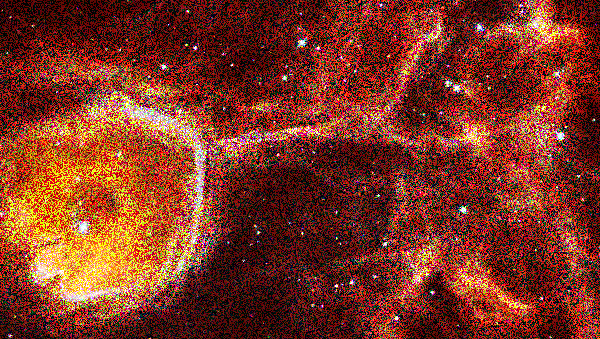
The photographer would like you to process the images and create final images that are much higher in quality.
The first thing to understand is how the files are named. The file naming structure is:
<imageSet>/<imageSet>_<ddd>.ppm
where <imageSet> can be mars, n44f, or cats_eye.
The <ddd> is a value from 1 to 10, with leading 0's to make a three-digit number.
All the images are in the PPM format that was discussed in lecture.
For example, if you look in the n44f folder, you will find these files:
All the images within an image set are the same size, but different image sets have different sizes. That means, all the images for n44f are the same size, but the images in the mars and cats_eye are different sizes.
Ask the user for an image set to process, and then process the images in that directory, averaging their pixels to create the final image. For example, if the user asked you to process the n44f image set, you would read all the files in that directory and create the final image n44f_good.ppm.
As mentioned in lecture, the values in the PPM file after the header are all integer values in the range of 0 to 255. Make sure when writing out each average value to final image, to write out an integer value.