main to
methods you don't want to test, be sure you document how you're testing
in the README you create to submit.
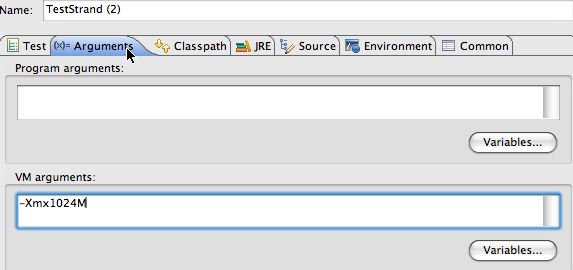
The benchmarking instructions say to increase the Java runtime heap size using the command-line argument -Xmx512M to start. This sets the amount of memory available for allocating objects from the Java heap, which is the name used for the storage from which memory is allocated when your program runs.
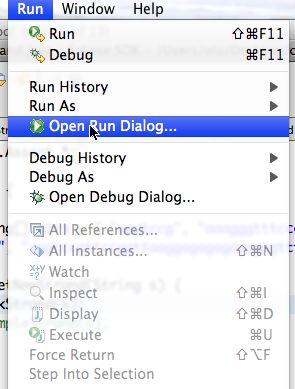
To specify initial heap size you must use the Eclipse Open Run Dialog ... menu choise from the Run menu. A screen shot is shown below on the left. When this dialog opens, use the second tab of the dialog, labeled (x)=Arguments and then specify VM arguments in the second text box as shown in the screen shot on the right below.
On the left the Open Run Dialog. You select this from the Eclipse Run menu to specify either command-line arguments passed to main or other arguments affecting how the Java program you write is run/executed.
On the right the dialog and how to specify a heap size using the VM arguments. Select the second tab and then use the section labeled VM arguments.
If you can't run with 512M because you don't have enough memory, try 256M, just be sure to document your runs in your README file. You'll need to run with several sizes, so if you can only support a max of 256M you might try another machine or go lower, e.g., to 128M.
In using the dialogs shown below, be sure to specify Apply and then Run to run with the designated heap size.
|
|
|
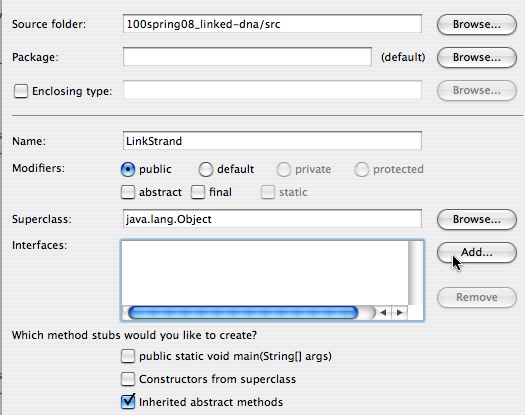
LinkStrand class that
implements the IDnaStrand
interface you should let Eclipse do the work of filling in stubs for the
methods you must implement. On the left below the dialog for
specifying a new Java class is shown. On the right the dialog
for specifying the interface IDnaStrand appears before
Eclipse fills in the methods required to implement the interface.
On the left below, when creating a new Java class you first specify the
name of the class. You don't need to change the super class, but you do
need to specify that you're going to add an Interface for the class
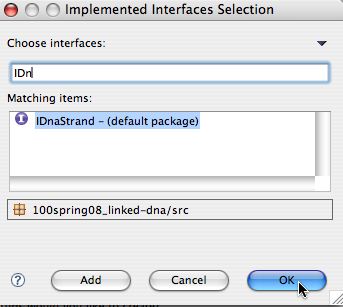
LinkStrand to implement; note that the Add...
button will be clicked.
On the right you enter the first few letters of the interface, in
this case IDn and let Eclipse find the potential
matches. Choose IDnaStrand in the default package and click
OK.
|
|
To test your LinkStrand class you're given testing code.
This code tests individual methods in your class, these tests are
called unit tests and so
you need to use the standard JUnit
unit-testing library with the
TestStrand.java file to test
your Strand classes.
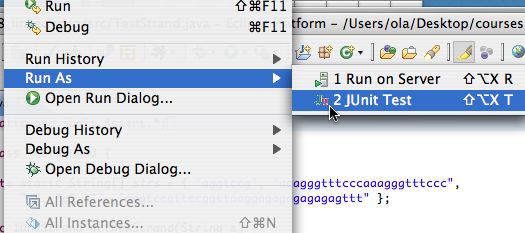
To choose Run as JUnit test first use the Run As option in the Run menu as shonw on the left below. You have to select the JUnit option as shown on the right below. Most of you will have that as the only option, I have two "run as" options on my machine.

|
|
There are several tests in the
TestStrand.java including tests
of the strand's length, toString,
append and cutWith methods.
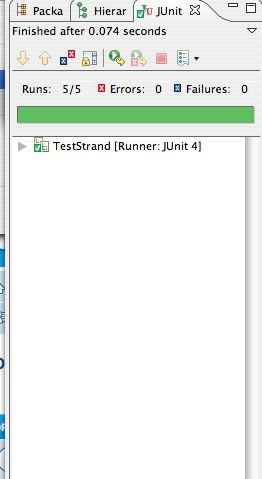
If the JUnit tests pass, you'll get all green as shown on the left
below. That screenshot was taken using the provided
SimpleStrand class
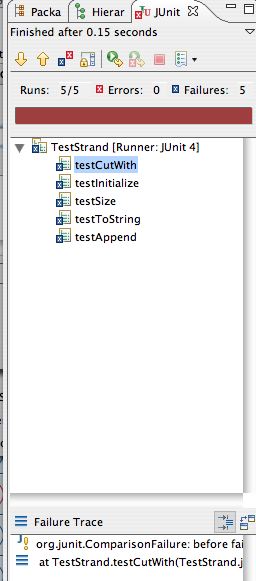
Otherwise you'll get red -- on the right below -- and an
indication of the first test to fail. Fix that, go on to more
tests. The red was obtained from a LinkStrand that
had nothing but code-stubs generated by Eclipse (with a
constructor added).
|
|